
Poptropica Cheats Survival
 |
| Poptropica survival island |
This is the first Poptropica Island to be released in multiple "episodes". This, and all islands after it, have no common (multiplayer) rooms, no blimp on Main Street, no domains registered for it that redirect to poptropica.com, and no ad rooms (they do however have huge ad spaces between areas).
Full Video Walkthrough
Written Guide
Episode 1
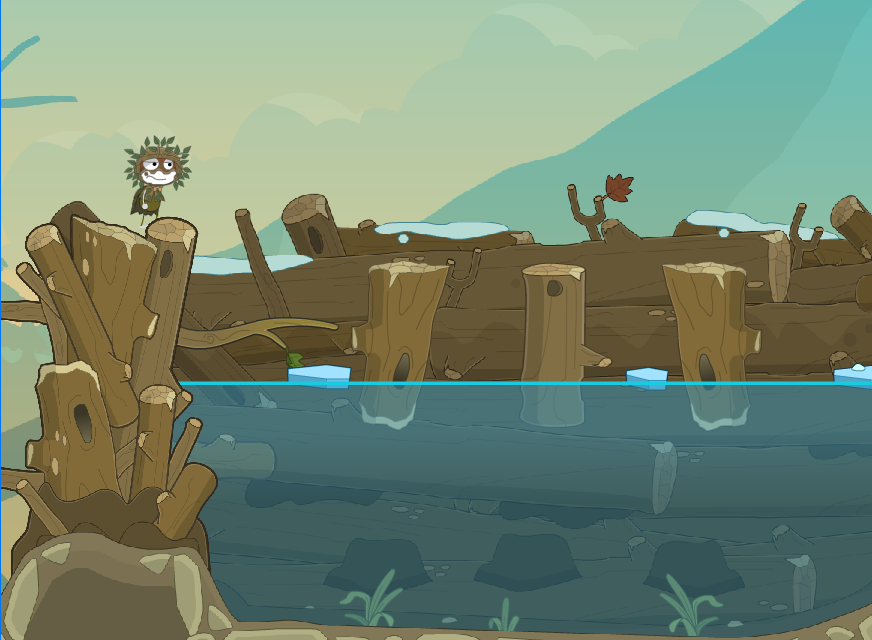
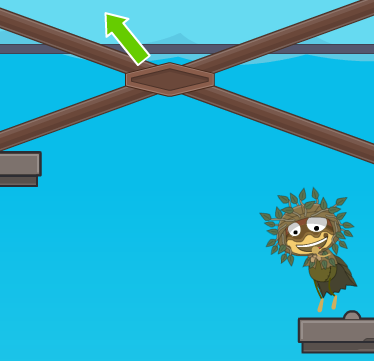
After watching, helpless, as your trusty golden blimp is struck down, you are stuck up in a tree with the wind in your face. Click on yourself to be free and crash into the thick powder. If you do not keep moving around, you will die of hypothermia, so remember to check the thermometer to the left to see how far gone you are. Walk left and pick up the red book. Jump up to the tree branch and jump right to pick up the missing page. Run almost all the way right and jump up the mound of boulders. Follow the woodpecker left, and pick up the next missing page from the branch. Drop down and run all the way right to disturb the squirrel. You can't follow it from there, so go all the way left and climb up the branches to where your blimp is. Jump across branches to the right, trying to stay high. At the last branch, you'll see the poor squirrel jump off the branch. Collect the nest.

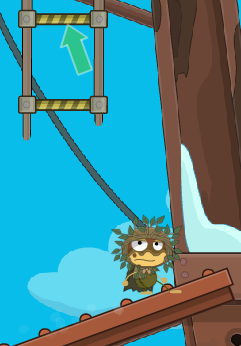
Drop off the branch and run all the way left, to the next area. Walk left and pick up the page from the snow, then run left until you get to the dry tree stump. Click on it to push it over, then pick up the missing page that was under it. Back away from the cliff and go right, until you see the ax stuck in a tree stump. Jump on the branch sticking out of it to the right, and you'll fly up. Jump from branch to branch to the right, again trying to stay high. When you reach the green parachute, click on the handle and climb up, then slide off to the right. Continue until you get to the blue backpack. Click on it, and something will fall out. Never mind it for now though...
Run all the way right, past the place where you started. Run right and collect the wet kindling. Go right and jump up to the slope, then follow the slope up. Jump your way straight up the tree branches at the top and grab the handbook page there. Drop off right and go to the next area, to the right. Walk right and drop into the fallen log, then go left and pick up the mittens. Jump out of the log and jump right, to the closest tree. Grab the next missing page and go back, all the way left, to the cliff area.
Click on the hole where the object fell from the backpack, click on the mitten in the bottom of the screen, and click in the middle of the screen to find a striker. Go right, to the area where you started, and go to the left edge of the frozen lake. Jump up onto the boulder and onto the thick branch. It'll fall off. Drop down and collect it.
Run all the way left, to the cliff, and put on the mittens. Click on the ax to pull out the ax handle, then run to the rightmost area. Equip the ax handle and click on the round boulder. It will roll down, revealing a hole and something shiny. Pick up the shiny flint and walk to the cave, and enter. Don't just barge to the right, there's a sleeping bear there! Instead, look at the falling water droplets. Some of them will seem to splash onto thin air. These are invisible platforms. Jump from platform to platform until you get to the right, and collect the dry kindling.

 tulis teks disini
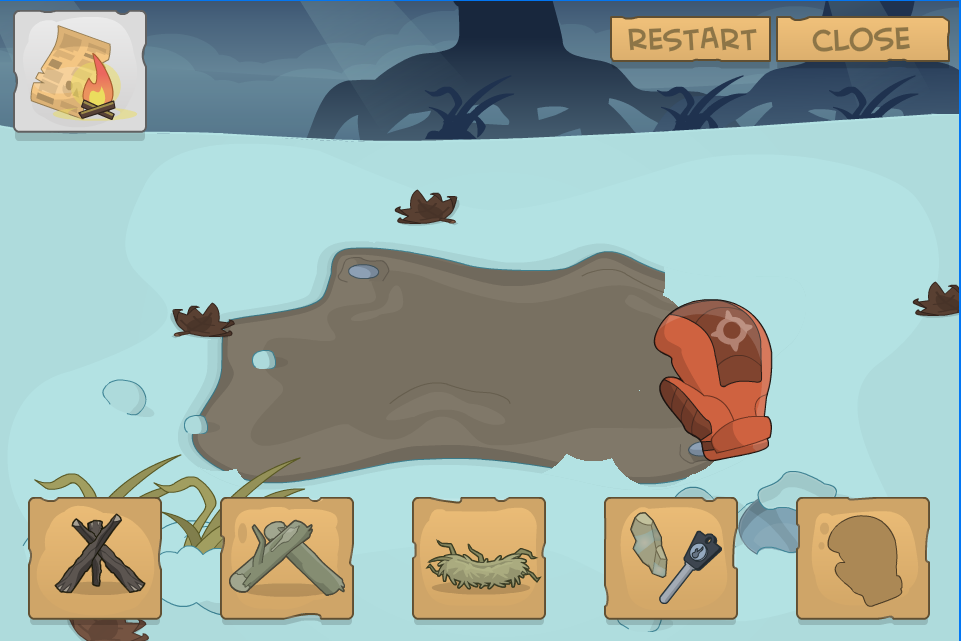
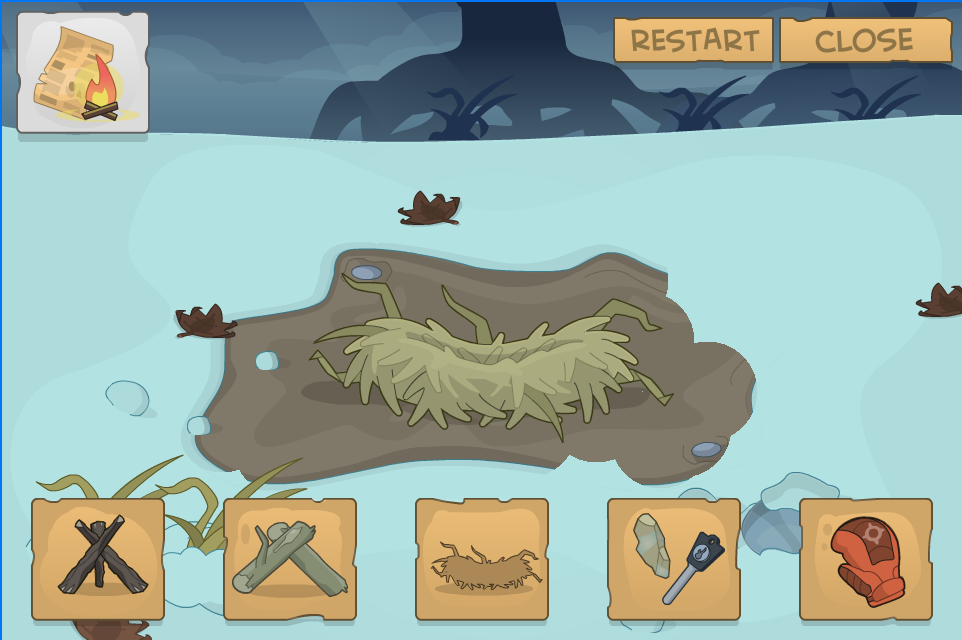
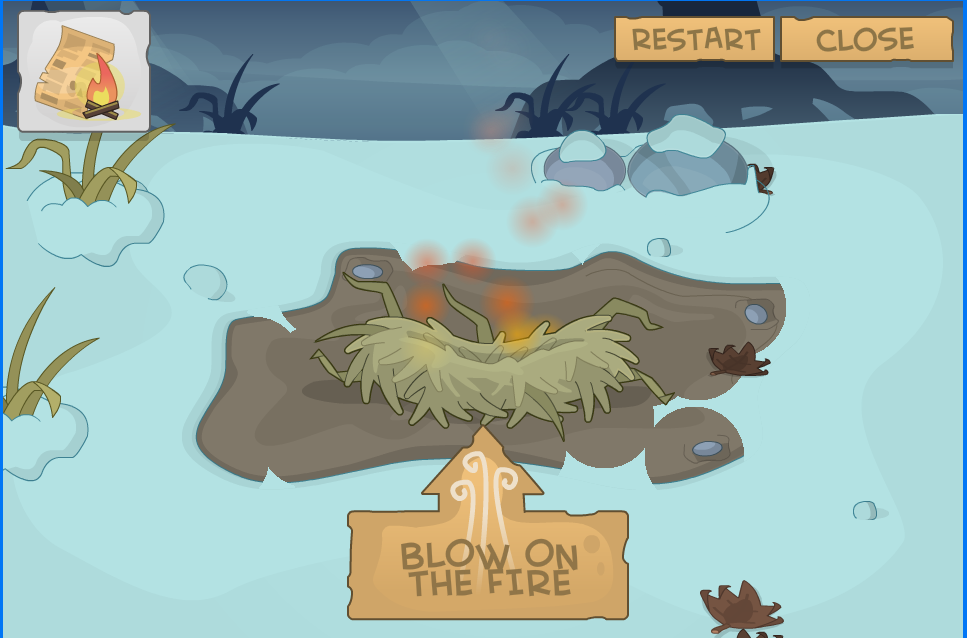
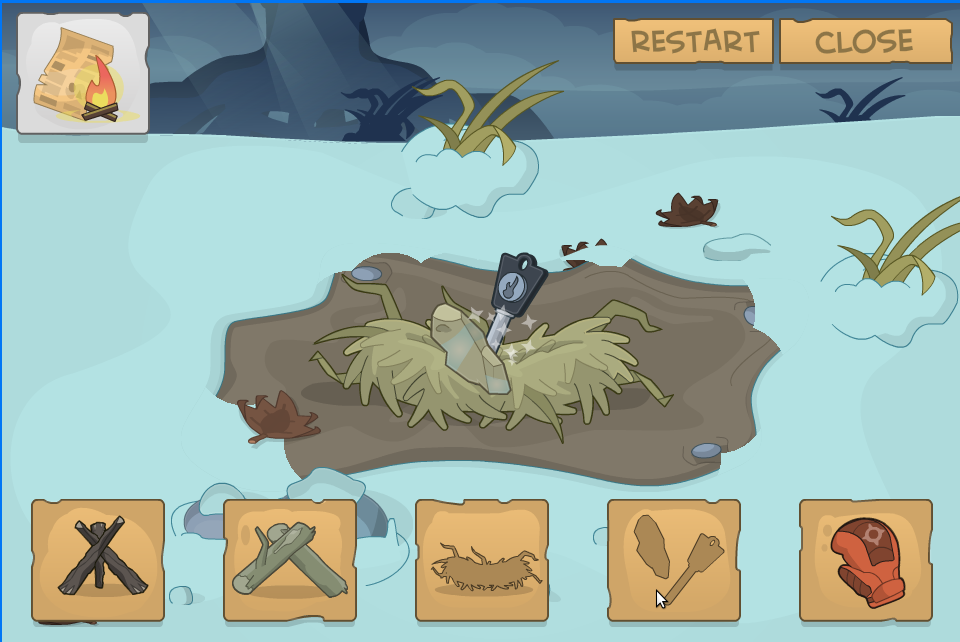
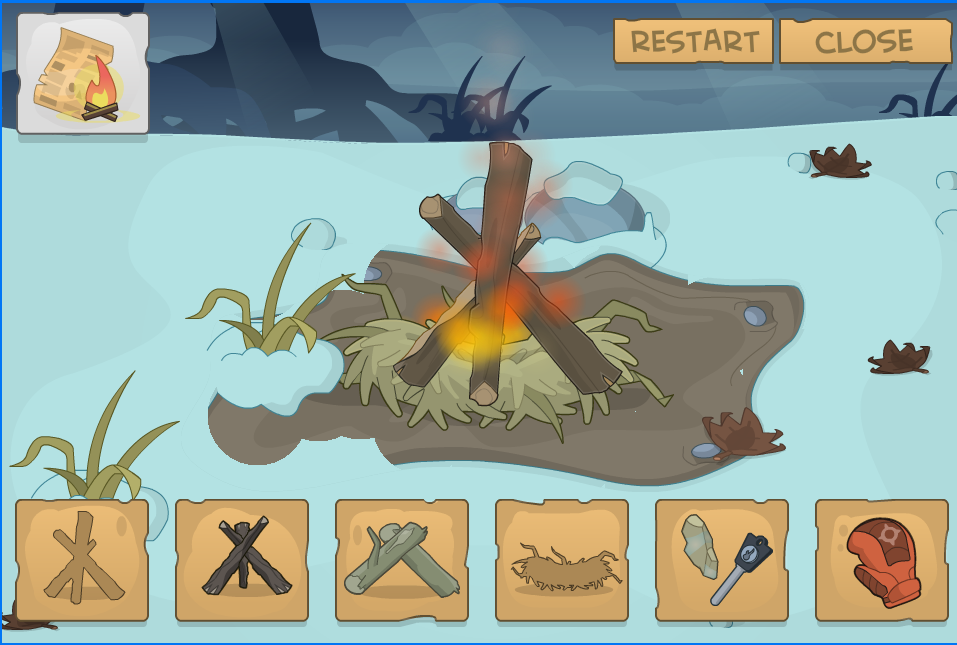
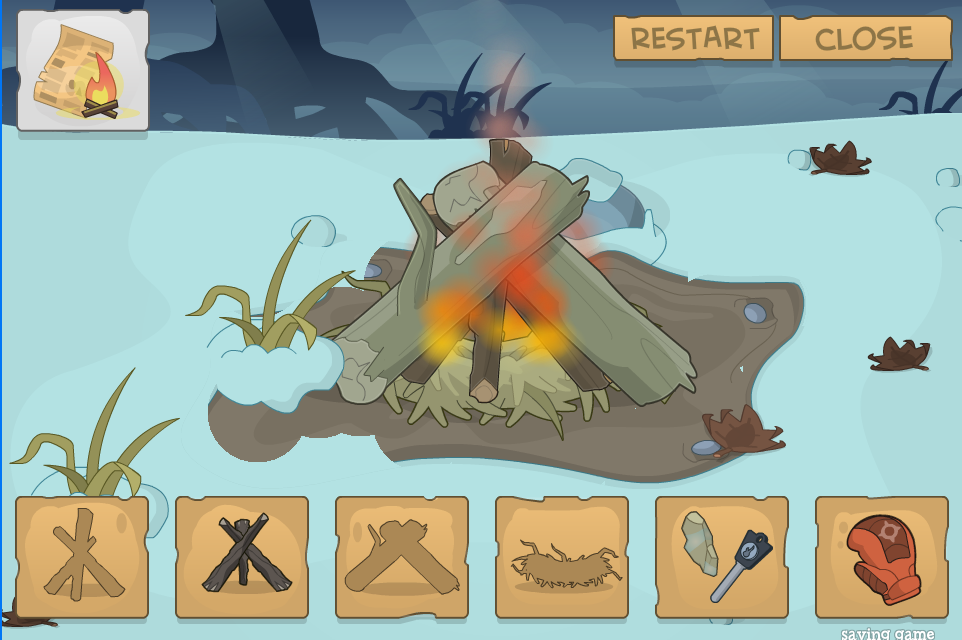
Now leave the cave and click on the boulder again. It'll fall into the groove there. Jump over it, next to the tree roots, and click on the fire icon. Now follow these steps to make fire:
Click on the mitten. Click on the middle of the screen to scoop out snow until you can't clear any more.
- Click on the nest
- Click on the flint and striker.
- Click on "Blow on Fire".
- Click on the dry kindling (leftmost symbol).
- Click on the logs. And you've got fire!
Also, check out the picture instructions below (click to enlarge).
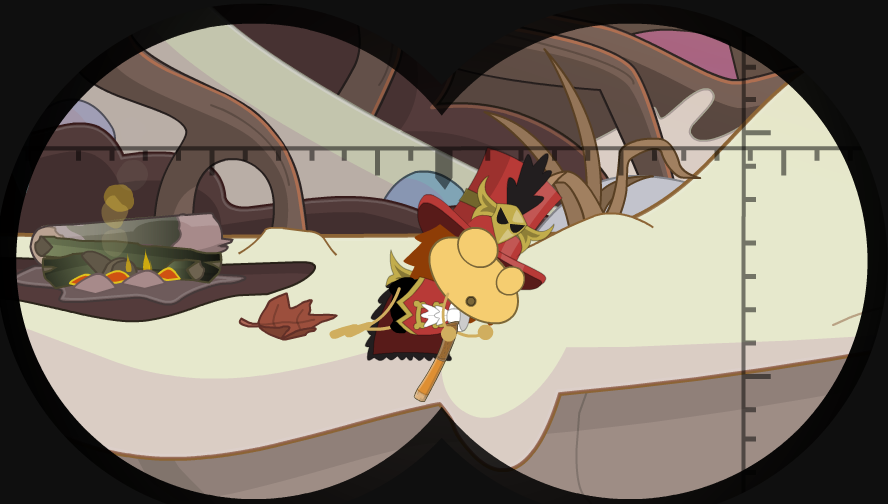
You gently rest, toasty warm by the fire, and drift off to sleep. But as this happens, you feel a sudden chill that has naught to do with the weather. The crosshairs swiftly zoom in. A mysterious coward is spying on you from afar with binoculars. Since when, we don't know. For how long, we don't know. And why? We don't know that either.
Episode 2
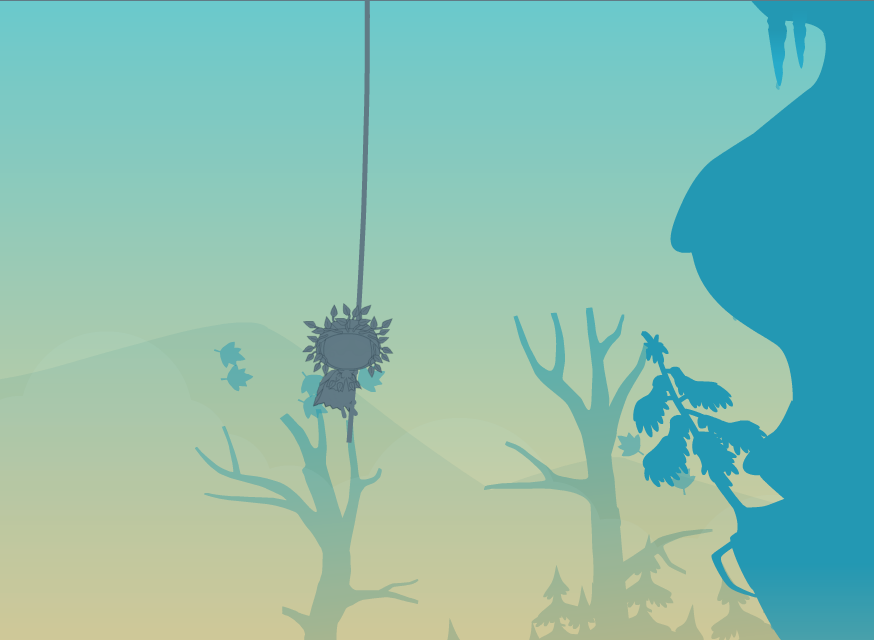
Now toasty warm, you are still quite hungry after that crash landing... but there's nothing to eat up in the mountaintops. So you fashion a rope and climb down the cliff, and fall onto a tree branch...
Drop off the tree branch and go left. Click on the broad, flat rock to lift it up, then collect the worms. Go left, dropping off the ledge, until you reach another flat rock. Jump up by jumping on the springy branch, then go left. Click on the small log to lift it, then drop down and go left, to the next area.
Easter Egg: (optional) Before going down the log, you can go left and collect the Fisherman's costume from off the rock. This is also available for free in the Store.
Go left, and jump across the freezing water to the beaver lodge. Jump your way left across the floating logs until you reach the stack of logs to the left. (In Episode 2 all water is freezing cold -- don't stay in for too long!)
The beaver dam is leaking through three holes, each with a log above it. When you jump on the stack of logs to the left, the holes will open up. When a beaver tries to reach a hole, jump onto the floating log above them to knock them away (this prevents them from fixing the holes). Eventually the dam will drain completely and you can drop in and go right, into the beaver lodge. Climb to the top of the mound and pick up the fishing hook. Then leave and go left, past the stack of logs. Go all the way left, to the next area.
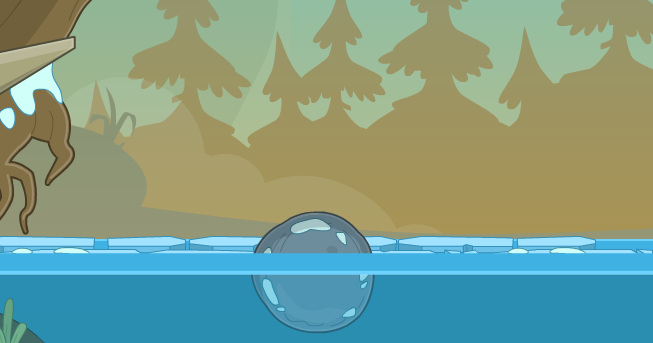 Well... generally it shatters...
Jump up the first springy branch and collect the fishing pole. Slide off this branch to the left, then slide off again; with luck, you'll land on the ice. Go left until you reach another flat, broad rock. Click on it to move it to the right repeatedly, until it fits over the small hole. Run left and click on the top of the chewed-through tree to push it to the left. Climb up the tree and click on the boulder. It'll roll down and shatter the ice covering the lake. (Regrettably, the image to the right does not accurately portray this process.) Go left, to the next area.
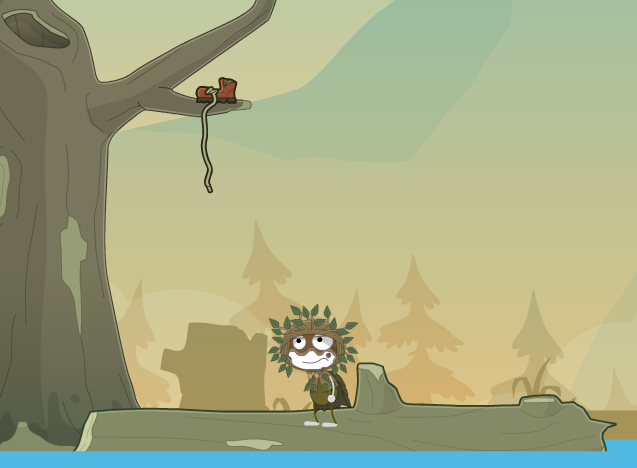

Click on the second chewed tree from the right to knock it down. Crawl over it to get to the branch, then jump left to the branch on the next tree. Click on the top of the dead tree there; it'll fall into the lake. Jump onto it and float until you reach the tree with a shoe hanging from it. Jump up to collect the shoelace. Jump onto the log's left side and float to the opposite bank, then jump off. Go all the way left, then make your way to the topmost branch of the tree there. USE the shoelace, USE the fishing hook, EQUIP the fishing pole, then press SPACE. You'll fish out the other shoelace. USE this shoelace, then run right to the previous area.
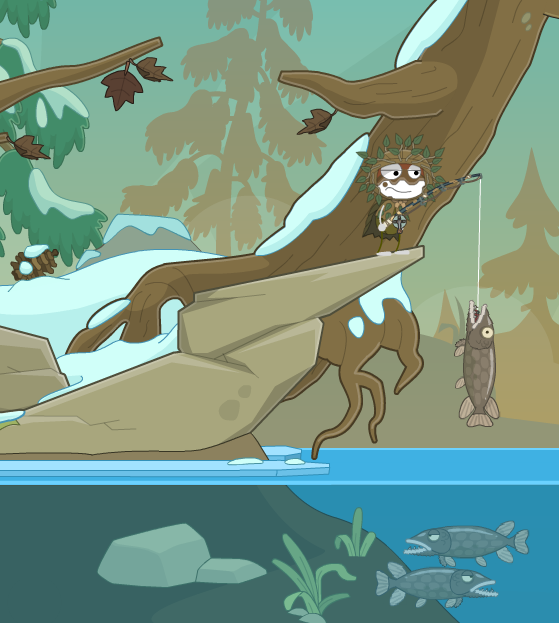
Go as far right as you can, to the ledge. USE the worms. Press SPACE to lower the fishing pole. Soon, a fish will catch on hook, line, and sinker -- and you can reel in your first meal in the Yukon. Now you're warm and well-fed, and you have the Survival EP2 medallion, and... what's this?

Not again! There are at least 5 cameras, hidden in trees all over the area. Most are observing the local wildlife... but the man in the dark booth is only focused on you. When will he reveal himself?
Episode 3
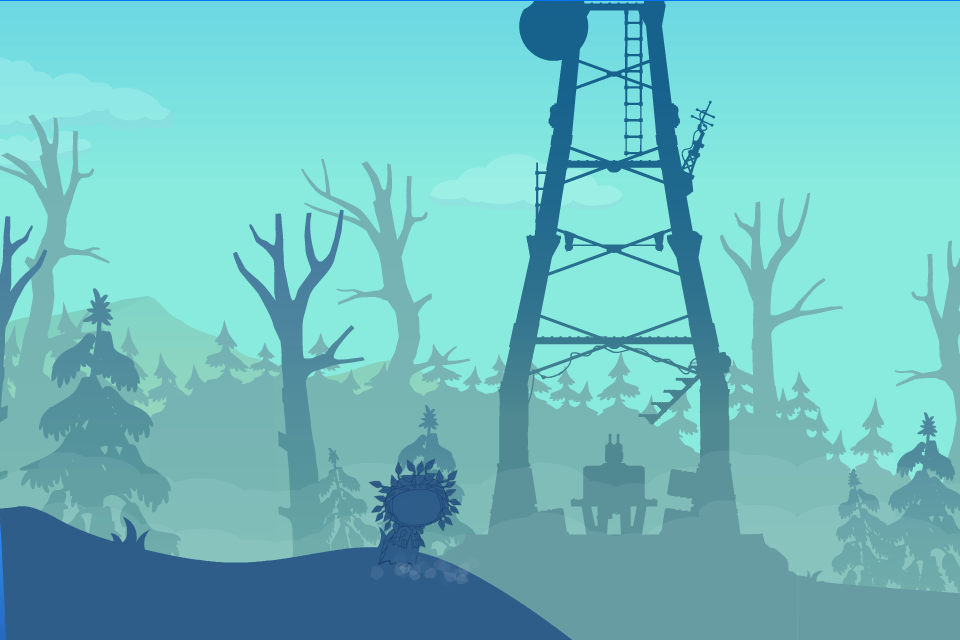
At last, a tall radio tower looms out of the fog and over the endless treescape. Run right, staying down, and collect the wire.
Wire
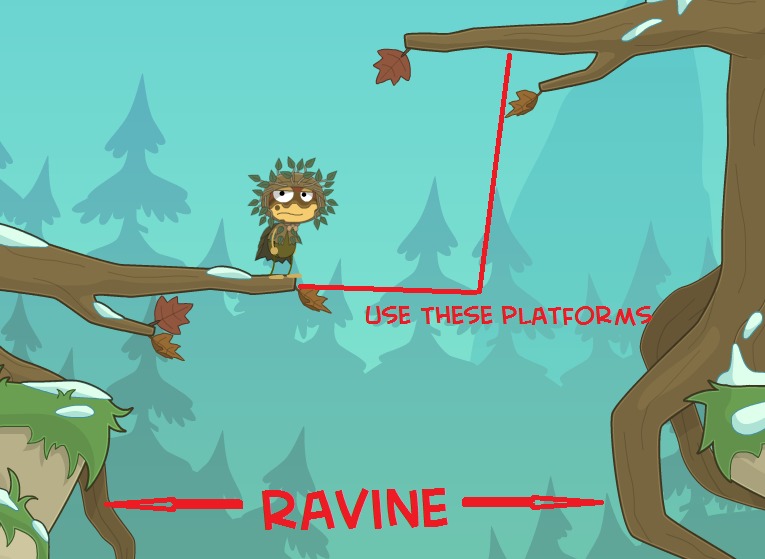
Go right, to the next area. Walk right, and use the overhanging branches to jump over the ravine. Above you is a plane with an uncharged radio in it but we can't reach it yet. Then, continue right to the next area. Jump up to the blue plane wing and walk to the right side of it. It'll tip over and fall onto a rock, making a lever. Go down to the river and jump on the left side of it to angle it all the way up, then quickly run up and make a big jump to the right. You'll land on the opposite bank; go right, to the next area.

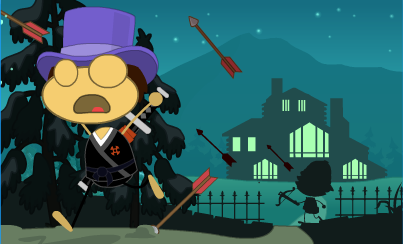
Jump, and don't look back!!!
Go all the way right, to the tree. Jump up the boulder and the branches to reach the top. Go left and drop onto the plane fuselage. Enter the plane from the left side and collect the nails. Go left and drop onto the branch there. Jump left and you'll land on a tree. On one of the lower branches of this tree, you can collect the red pocket knife.

Go back right, to the farmost tree you climbed before. Climb it again, and stand on top of the weak point in one of the branches. Use the pocketknife and it'll become hanging and slowly go up. It has become a pulley, with the crate of lemons on the other end. Jump on top of the branch and it'll slide all the way down. Now use the pocketknife again. The crate of lemons will suddenly fall and break open. Grab a lemon and go to the area left.
(In case you're confused, we're going to make the infamous lemon battery).
 The coin you're looking for;
That's supposed to be Abe Lincoln
Go left to the beaver-chewed tree and use the pocketknife to cut it down. Jump on top of it and click the red bag. Move the coins aside by dragging them away. Here, you're looking for a dull brown, scratched-looking penny (American coin); it's near the bottom. (fun fact: Pennies made before 1982 were 95% copper, which is very conductive. But modern pennies are made of zinc, which is much less useful. This is a 1981 penny). Now you have all the materials for a lemon battery!
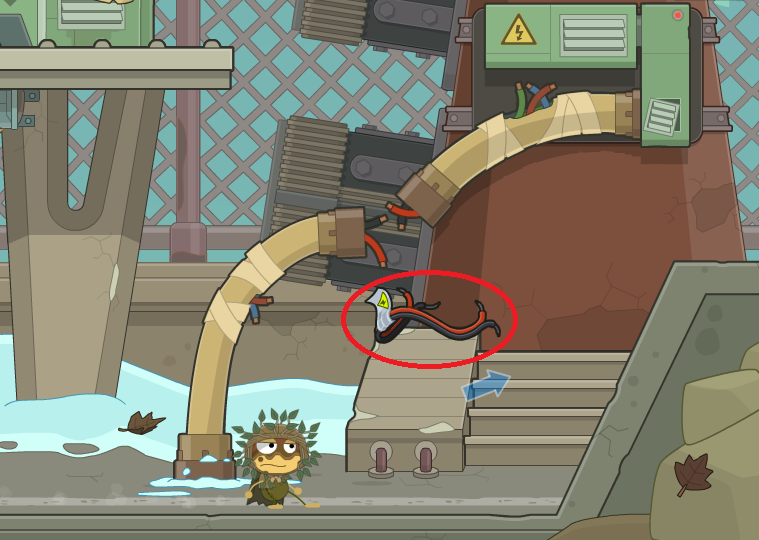
Run to the area left. Approach the ravine but don't cross it; instead, jump your way straight up using branches and a rope at the top. Slide off the rope and enter the plane fuselage from the right. Pick up the plane manifest. Hey, I guess that's where the free fishing pole and fire equipment came from. It says, "it was a trap! Do not trust MVB!" Anyway, go left and click on the radio. Before you can reach it, the plane will tilt and you 'll fall out. Cross the ravine now. From the other edge, jump your way up to a branch with a weak point (looks like a whitish strip). Use the pocketknife, and the branch will snap off causing the plane to drop again into a somewhat horizontal orientation. Drop onto the plane and enter from the right. Now pick up the radio. Oh no, the plane is about to plummet headfirst into the ravine! Jump up the seats and out the back to get onto a safe branch, and the plane will slide down. Now go left, to the next area.

ASSEMBLE the radio. It's pretty simple, stick the nail in the bottom-left part of the lemon, stick the penny in the top-left. Then attach the red wire to the penny and the black wire to the nail. Now switch the radio to ON and the other switch to TRANSMIT. But we still need signal, as the signal indicator in the left-bottom is apt to tell you (OK, in real life that's just illogical. The radio is transmitting, not receiving, and even if it was, nobody is sending. So what is it really measuring?).
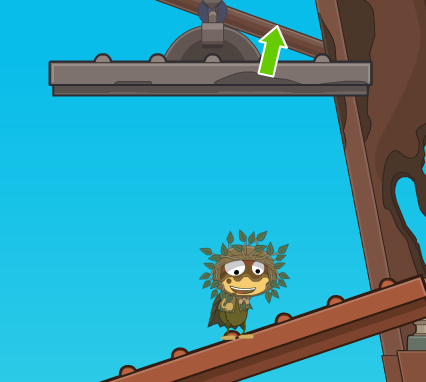
Let's get back to the radio tower base in the far left. Jump up to the big green box, and pull the lever. A pair of stairs will extend. Jump to the top of the green radio boxes and jump onto the stairs. Climb the stairs. Click on the silver bracket to the right of this platform and it'll fall off. Go to the left of this platform. Go to your items and click the screwdriver (rightmost icon) on the pocketknife card, then click USE. The platform will turn into a see-saw. Tilt the right side up, then run up there and jump up to the gray platform. Jump left to the other gray platform when this one stops. Then jump up the ladder. Jump on the next ladder to make the bottom part crumble. Now unscrew both sides of this platform and lever up the right side. Jump up to the ladder and climb up. Jump onto the left side radio dish, jump up. The ladder will crumble so use the rope. Then slide off and jump up. Hear the wind whooshing against your wilderness-weary body up there? That's the smell of freedom... anyway, now USE your radio.
Tower Jump 1
Tower Jump 2
Tower Jump 3
The "Van Buren Force" chopper will arrive and safely whisk you off the tower. But remember what was scribbled on the mysteriously crashed plane's manifest: "Do not trust MVB." And MVB is Myron Van Buren....
Episode 4

The chopper lands smoothly in the night next to an illuminated wilderness cabin. Myron van Buren, your rescuer, welcomes you in. But there's something strange here...
Follow Van Buren right, into the Trophy Room. After his spiel about hunting and introductions, talk to him again. Then go left and exit, back into the Main Hall. Go all the way left and enter the door marked with a fork and knife. The meal is poisoned! You'll fall asleep and end up locked in the guest room. I knew there was something not on the level with this MVB guy...
 Click to zoom
Get off the bed and click on the bear's right claw. You'll collect it. Go right and USE the bear claw to break the door open. Now, there are two red security camera beams sweeping the floor in front of you. They are synchronized so one is a mirror image of the other. When the closest one recedes, go forward and click on the plant to hide behind it. When it passes behind you, click again to stop hiding and walk right. Jump on top of the walrus and duck until the next one recedes. Go forward and hide behind the next plant. Wait for the beam to pass, then get up and click the lock icon by the door to disable the cameras. Now exit the room.

Climb down the stairs and enter the banquet hall. Go left, collect the pitcher off the table, then go right and click the sink to turn it on. Now quickly USE the pitcher, and jump up on top of the topmost squirrel. Wait until the cook passes below you, then jump to the left over her. Go left, and collect the meat. Then jump onto the table and click on a plant to hide behind it. When the cook passes again, click again and run right, out of the room. Whew! That was close! Well, it's not the last time...
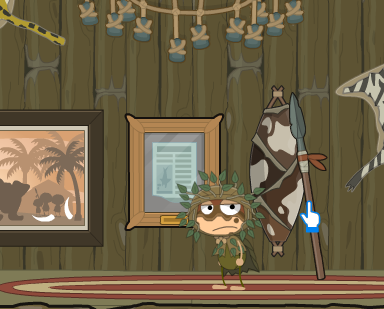
Exit into the Main Hall and go right, to the fireplace. Jump up onto the mantel and jump onto the right antler of the moose there. It'll tilt a little. Jump on it twice more and it'll fall off. Collect the Trophy Room key from behind it. Now go right and USE the key to enter the door marked with a trophy icon. Go right and collect the spear.
Keep going right and jump on top of the statue of Van Buren. Jump to the elephant trunk, which will launch you onto the crocodile head. It'll fall, smashing the statue! Now click on the statue to collect the Voice Recording. Exit the trophy room.
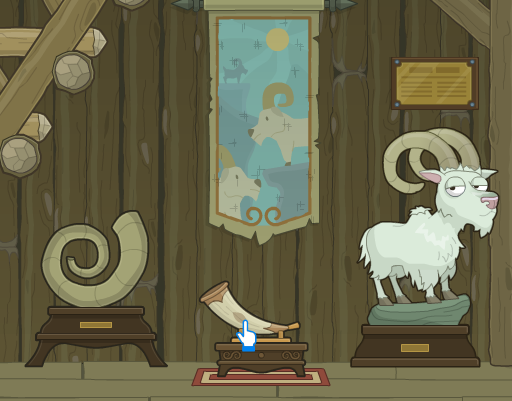
Go left to the fireplace. USE the pitcher to douse the fireplace, then click the right-hand candlestick to reveal a hidden passageway! You can click on it to enter. When you're inside, you're still in the same room, but behind the wall. Go right and click on the horn.
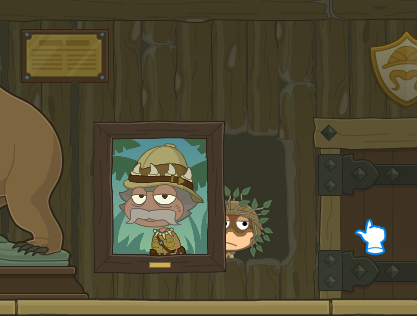
Winston will walk to the leftmost part of the platform above you, away from the door. Go left and enter the hidden passage. From behind, climb the stairs and walk past Winston, then click the painting of Van Buren to exit. Now enter the door marked with Van Buren's beard.
 Only use the light blue platforms
Go right and click on the door to open it. Here, you have to reach the sleeping Van Buren at the far right, but avoid waking him up. To do so, jump your way right, only jumping on the wall-mounted animal heads! When you're on top of the tiger under the window at the right, USE the spear to get the key. Now jump your way back the same way, again careful to jump only on the animals. Exit the room.

Go down the stairs (no more Winston!) and go right, into the Trophy Room again. Go all the way right and USE the Armory Key (the one you just got) in front of the glass case. Collect the Night Vision goggles, and, optionally, costumize the dummy there. That's it -- it's time to break out! Equip your night-vision goggles.
Exit the room and go all the way left, to the security device under the EXIT sign. USE the Voice Recording; it's (presumably Van Buren) saying "Tally-ho" (it's okay, I'd never heard the phrase before either). That's only half of it. Click on the device and type in the security code: 0451. It's open! Go left and out.
Jump onto the snow-covered logs and then jump to the left, onto the branch. Jump left to the next branch. Go to the left edge of the branch and USE the tainted meat. You'll drop it in front of the guard dog, who will merrily gobble it up and get knocked out cold. Go past him all the way left, to the gate, and click on it. You're free!
But that's not the end of it. You've set off the alarm... and now you're the quarry in a crazed madman's wilderness hunt! To be continued in episode 5...
Episode 5
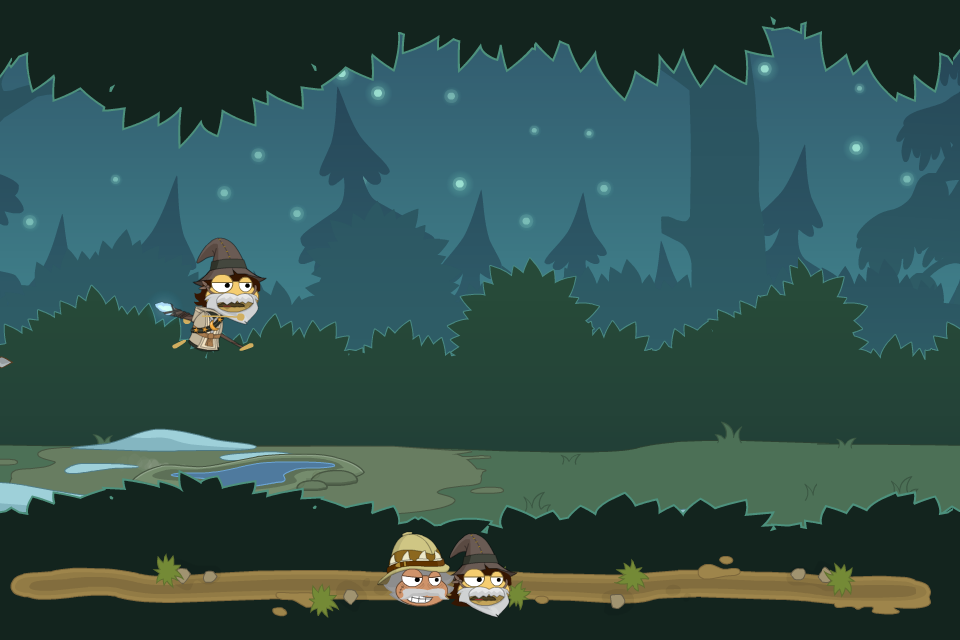
You start off immediately at the end of Episode 4: Myron van Buren and his hounds are hot on your heels and you've got to run! The chase is fairly self-explanatory: you run to the right, and click to jump/duck. Jump when you see puddles or bushes, duck for trees. One tip: you have to jump and duck a little bit later than you'd guess, since the effect (especially for duck) doesn't last that long. Suddenly, at the end, you fall into a hole and the dogs lose the scent. You're now inside the secret bunker of Max McGullicutty, a.k.a. "M.M." He's a former passenger on the crashed plane from Ep. 3 and he's been hiding from Van Buren for a year!
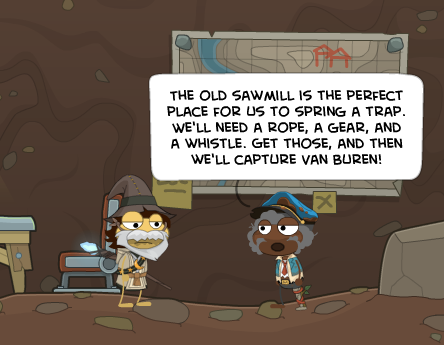
His plot to ruin Van Buren requires you to find four things: a rope, a gear, and a whistle. Before we start that, go right and drop down to the lower floor. Go left and grab the fishing pole. Now go back to the top and climb up.
Now you're inside an underground network of tunnels right under the nose of Van Buren's operations. The first thing we need to get is the whistle.
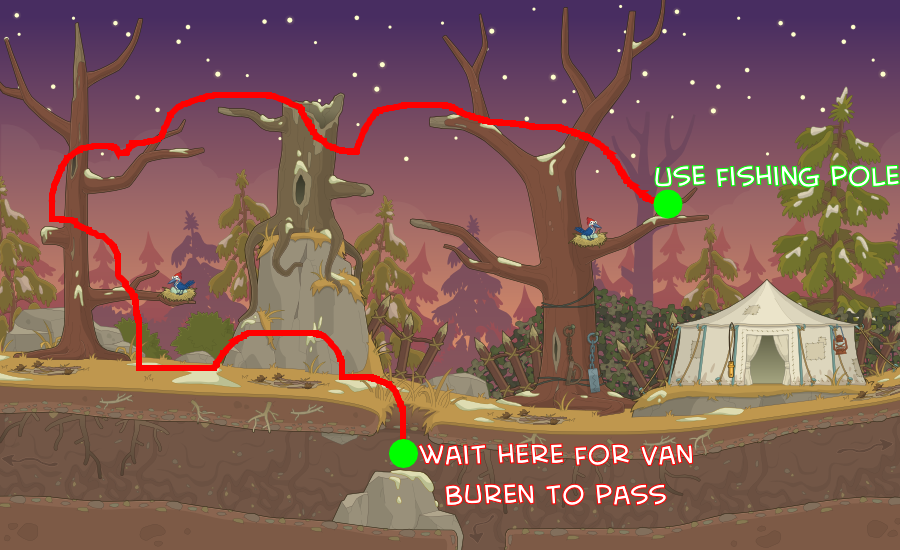
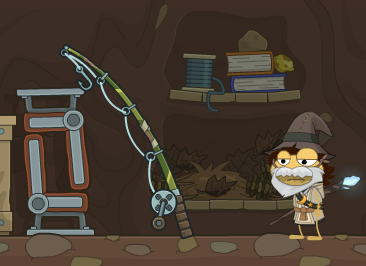
Jump on top of the rock, then wait until Van Buren passes to the left. Jump out to the left, and follow him until you get to the branch with the woodpecker on it. Avoid touching the woodpecker or the piles of twigs! Climb this tree, then jump off right to the gray tree. Jump right again from there to the second brown tree. Go to the far right of the branch of this tree and equip your fishing pole. Press the SPACEBAR. You'll hook the whistle and reel it in, all under the nose of that hound! Now get back down to the tunnels. Go right, to the Traps.

Go right, through the green mucky water with mushrooms. Push the flat gray rock to the left until it rests on the tall rock, then jump on it. When the dog above passes, jump up and push the rock there to the right twice. Click on the green bush to hide behind it. Wait until the dog passes left, then come out and push the rock once, then hide again. The next time the dog passes, push the rock once, then jump on it and jump to the the grassy platform. Jump up again. Hey, there's our blimp! So sad to see it go... Anyway, push the next gray rock to the left until you can jump on it and jump up to the next platform. Click the tree to knock it down, creating a bridge. Cross it and now you'll see an orange rope swinging slightly off a branch. Jump on top of the branch to the right of the one where the rope is hanging. Click on the rope, and the bear (yes, bear) hanging from it will fall. Drop down there and pick up the rope. Then return to the tunnels and go right, to the Waterfall.


This place is full of traps, so watch out! As a general rule, anything looking like a trap should be avoided. Jump right, and there'll be a trap ahead of you. Jump up to the branch above it, then slide right to the see-saw branch. Walk to the right edge of it and drop down through the gap into the water. Swim right and jump up the springy branches. Drop off to the platform to the left, making sure not to land on the trap. From here, jump up when the dog passes to the right, then hide behind the green bush. When the dog passes to the left, unhide and climb up the tree to the right. Run all the way right from there, and drop down the see-saw branches to the water at the bottom. To the left, there's a cage containing a beaver. Jump onto the cage and click the gear to collect it, releasing the beaver. That's the last item we needed to trap Van Buren! Re-enter the tunnels and go all the way left, past the Base Camp, to the Sawmill area.

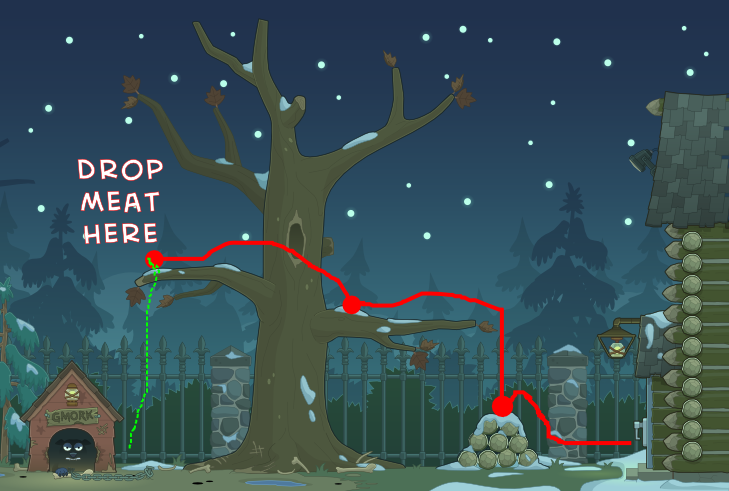
When Van Buren passes to the right, jump up on the wood pile and jump left, into the sawmill. Go to the spinning gears, and USE your gear. Jump on the mill wheel, and jump up to the platform above. Go right and push the box to the right; it'll fall and hook the orange rope. Go to the left of this platform and USE the rope. The trap is set! Drop down and blow the whistle. Wait for it... where is that Van Buren?
GAAH! He snuck up behind you, and now you're trapped! But then, out of nowhere comes Max McGullicutty... on a BEAR! He'll break you out, pushing Van Buren onto the spinning mill wheel! That's gotta hurt... but you don't care because now you have the episode medallion and are flying away over a sunset...

The End.
